
Briskets are a delicious smoked meat that is often served at holiday meals. They are also very versatile and can be cooked in a variety of ways.
Many meat lovers, however, will agree that cooking a brisket in an electric smoker is the only way to do it.
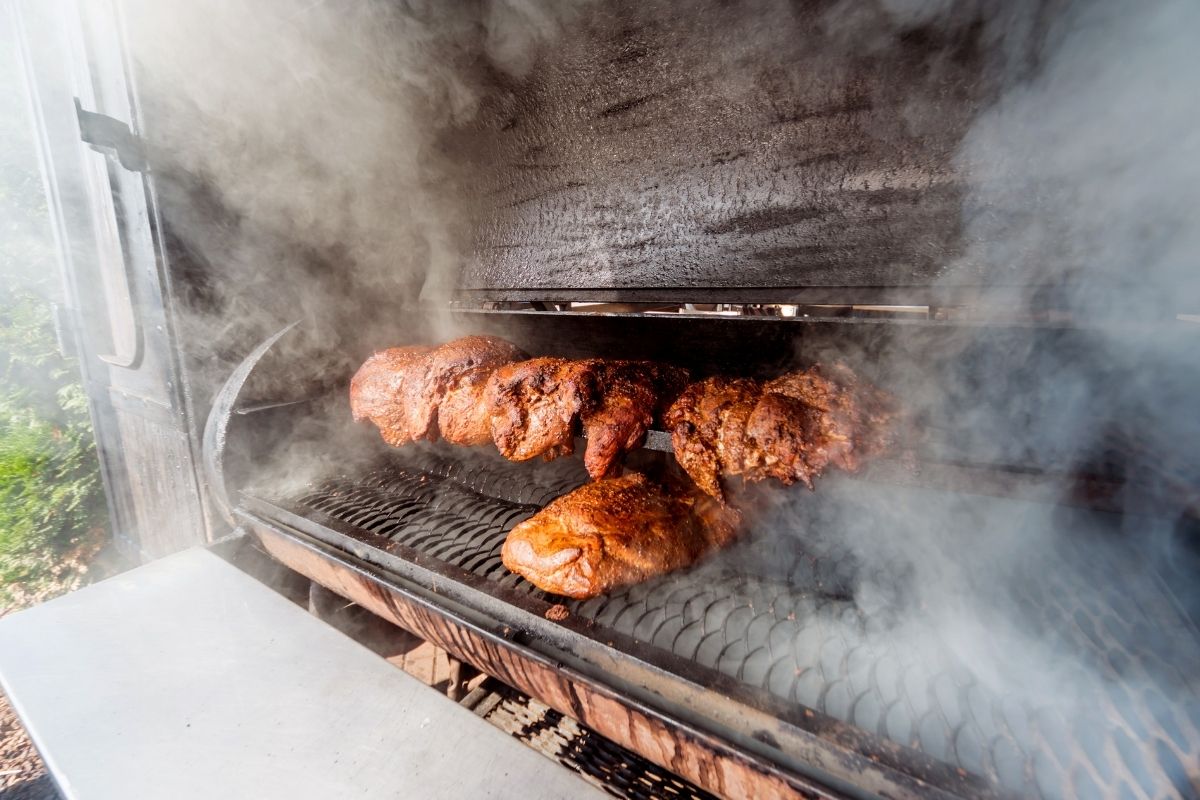
Smoking meats is a great way to add flavor and tenderness to your food. This method is especially useful for cooking large cuts of meat such as whole beef or pork shoulders.
The key to smoking a brisket is to cook it low and slow.
And when we say slow – we mean slow. Some briskets, depending on the size, can take up to 12 hours. But if you’ve ever tried a smoked brisket, you’ll probably agree that the longer it takes to cook, the better the taste.
To make your personal favorite brisket ever, you’re going to need to conduct some trial and error experiments. This will help you to find your favorite rubs, wraps, woods, bastes, and temperatures.
If you have already experimented with these things, you’ll probably have a better idea of what you like and what you don’t.
However, if you’re a complete newbie, you’ll benefit from tasting different spices and methods to perfect your own brisket.
Today we’re going to be looking at everything you should know about how to smoke a brisket in your electric smoker. Once we’re through, you’ll be ready to invite everyone round for the best brisket they’ve ever tasted!
Cooking Times For Brisket In An Electric Smoker
Below is a table telling you how much time your brisket will need in your electric smoker to be cooked properly.
Bear in mind that these cooking times are for per pound of brisket, and the times will depend on whether the meat is wrapped or not, and the temperature of your smoker.
| Size Of Brisket | Temperature Inside Smoker (F) | Is The Meat Wrapped? | Cooking Time For Brisket |
| For Each Pound Of Brisket | 250 | Unwrapped | 15 Minutes |
| For Each Pound Of Brisket | 250 | Foil Wrapped | 45 Minutes |
| For Each Pound Of Brisket | 250 | Butcher Paper Wrapped | 1 Hour |
| For Each Pound Of Brisket | 300 | Foil Wrapped | 30 Minutes |
It’s incredibly important that you take these cooking times with a pinch of salt and use a meat thermometer to ensure that your meat is completely cooked and safe to eat.
Another thing to remember is that these cooking times are for every pound per brisket. This doesn’t mean that your entire brisket will only take an hour to cook if it is wrapped in butcher paper at 250 degrees.
Instead, you need to cook your brisket for the same number of hours as its weight in pounds. For example, a 12 pound brisket wrapped in butcher paper will need around 12 hours of cooking time in a 250-degree smoker.
Similarly, a 12 pound brisket will need to be cooked for 6 hours if your smoker is at 300 degrees and the meat is foil wrapped.
While you might want to cook your meat as quickly as possible, remember that the best briskets are cooked low and slow. So, the fastest cooking time might not be the best for the flavor and tenderness.
Cooking Your Brisket In An Electric Smoker: A Step-By-Step Guide
Now let’s take a look at how to cook your brisket in your electric smoker. We will be breaking down each of the steps so that you can do it (near) perfectly from the get go.
1. Choosing The Brisket
Of course, the first thing that you need to do when embarking on your brisket cooking journey is to choose the best brisket possible. There are a few things here that you should consider, which we will list below now.
The first thing to think about is the flexibility of the meat. We bet you weren’t expecting us to say that! Briskets need to be able to bend reasonably easily to ensure that it cooks and remains tender.
This is because the more flexible the meat is, the less connective tissue is within the cut.
While connective tissue can break down in the cooking process to a gelatin consistency, smoking does not often achieve this as well as higher temperature cooking. So, when smoking, look for a flexible brisket to use.
Next thing to think about is the size of your brisket. These cuts of meat can come in all sorts of sizes, from a tiny 5-pound brisket to an amazing 25 pounder. The average size of a brisket, however, is between 12 and 16 pounds.
You can choose whichever size you want to opt for, but remember that the larger the brisket, the longer the cooking time is going to be.
A larger brisket is also going to be more expensive. If you’re not cooking for that many people, we would suggest starting out with a brisket on the smaller size.
Whether you want the point or the flat of the brisket is another consideration to take into account. The flat is the leaner area of meat while the brisket point contains more fat.
Meanwhile, the packer is where the fat has not been removed or trimmed away from the brisket and the flat and point are still connected.
A packer is much larger as it is the entire cut of meat, while the point and flat are smaller as they are only half of the entire cut.
If you’re purchasing an entire packer, you should look for one with a thicker flat. This is so the whole brisket cooks evenly and the flat doesn’t get dried out while the point is still cooking.
Look for a brisket with more marbling, too. Marbling is how much fat is running through the beef. The better the dispersion, the more your beef will look like a slab of marble thanks to the beef.
The more marbled your meat is, the better quality it is – so look for a good amount of marbling.
Now that you have found your perfect brisket, bring it home and get it ready to cook!
2. Trimming The Meat
Now that your brisket is home and waiting to be cooked, it can be tempting to want to rush the process and get it in the smoker right away.
However, hold off for now. It is better to prepare your meat thoroughly instead of rushing the process, so be patient!
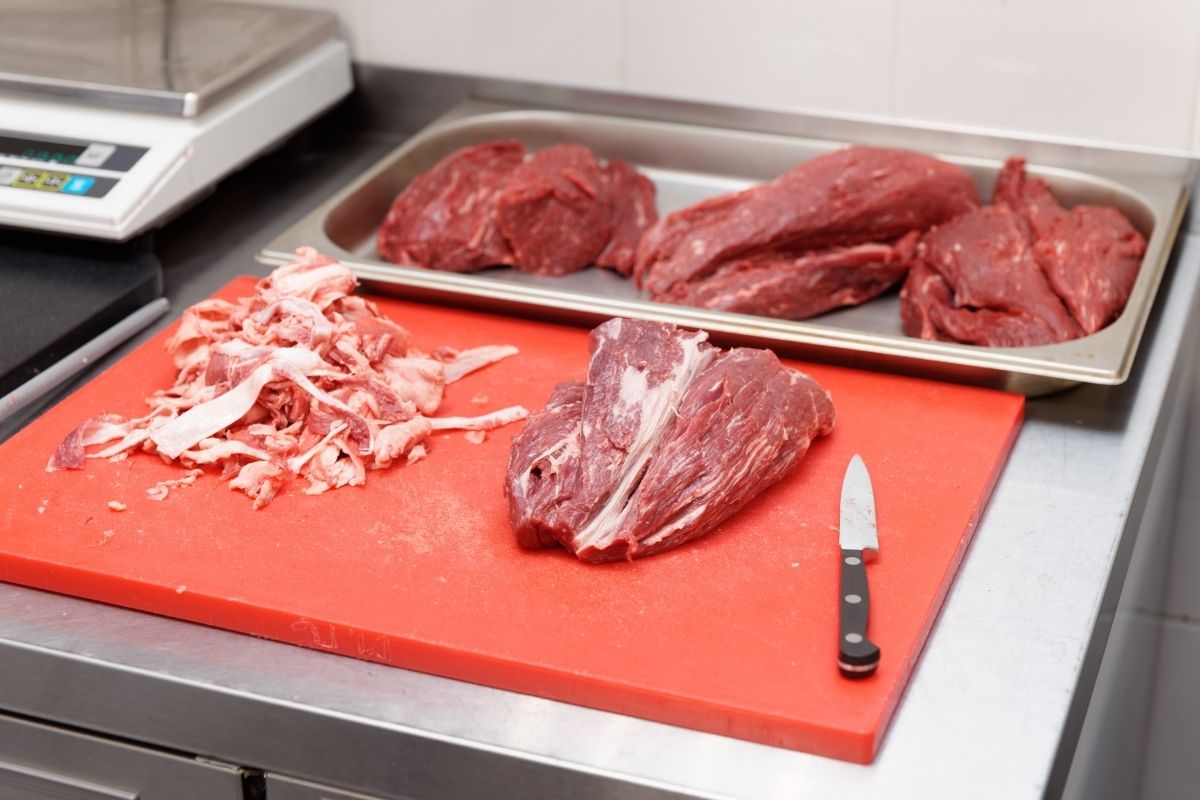
The first step in preparing your meat is to trim the fat. This is a vital process because it determines how your brisket will cook in the smoker.
You don’t want to remove all of the fat because this is what keeps the moisture within the meat while it’s cooking.
However, if you don’t trim the fat enough, the smoke will have a hard time penetrating the meat. This will mean the flavor is not as impressive as it should be from smoking. It will also impact the cooking time.
So, it’s a fine line between cutting too much fat off and losing moisture, and not cutting enough off and reducing the flavor in the final product.
Equipment Needed
To ensure that you’re trimming the fat properly, you should make sure that you have the best and correct equipment to do so. Here is a list of all of the equipment needed to trim brisket fat.
– Narrow curved boning knife. Make sure that this is sharpened! This type of knife will make it easier to remove large pieces of the fat cap so that it doesn’t take too long to complete.
– A cold brisket. The colder the fat of your brisket is, the easier it will be to trim. Leave your brisket in the fridge up until the moment you’re ready to cut it.
Trimming The Brisket Method
Now that you have a cold brisket and the right kind of knife, it’s time to trim the fat cap. First, start with trimming the sides, then remove any loose slices of fat, and finish with the ends.
Make sure to leave a quarter-inch of fat all over your brisket so that the meat underneath doesn’t dry out.
Now move to the middle of the meat. Between the point and the flat, you will see a thick layer of fat, otherwise known as the deckle.
This can be fully removed as it won’t render while smoking. If you cannot locate the deckle, it might be because the butcher has already removed it.
Hopefully you are familiar with your electric smoker and therefore know whether there are any hot spots or cold spots within the cooking space.
If you know the location of these, you can work out where they are going to be in relation to your brisket.
If you know of any hot spots in your electric smoker, keep some more fat on the areas of the meat that are likely to be affected. This will protect the meat and hopefully stop it from drying out.
3. Using Your Binder And Rub
Now that the fat is trimmed and more of the meat is exposed, you can add your dry rubs and binders to enhance the taste of the final product.
Dry rubs are known for bringing out the natural flavor of the wood chips you use.
A rub will also help create the crunchy exterior that we all know and love on a brisket. Plus, it will season the meat and create an even more mouth-watering taste.
Dry rubs are made from spices and seasoning, so it needs a binder to hold it to the meat.
Without a binder, the rub is likely to fall off of the brisket during the cooking process, leaving you with a less flavorful end result.
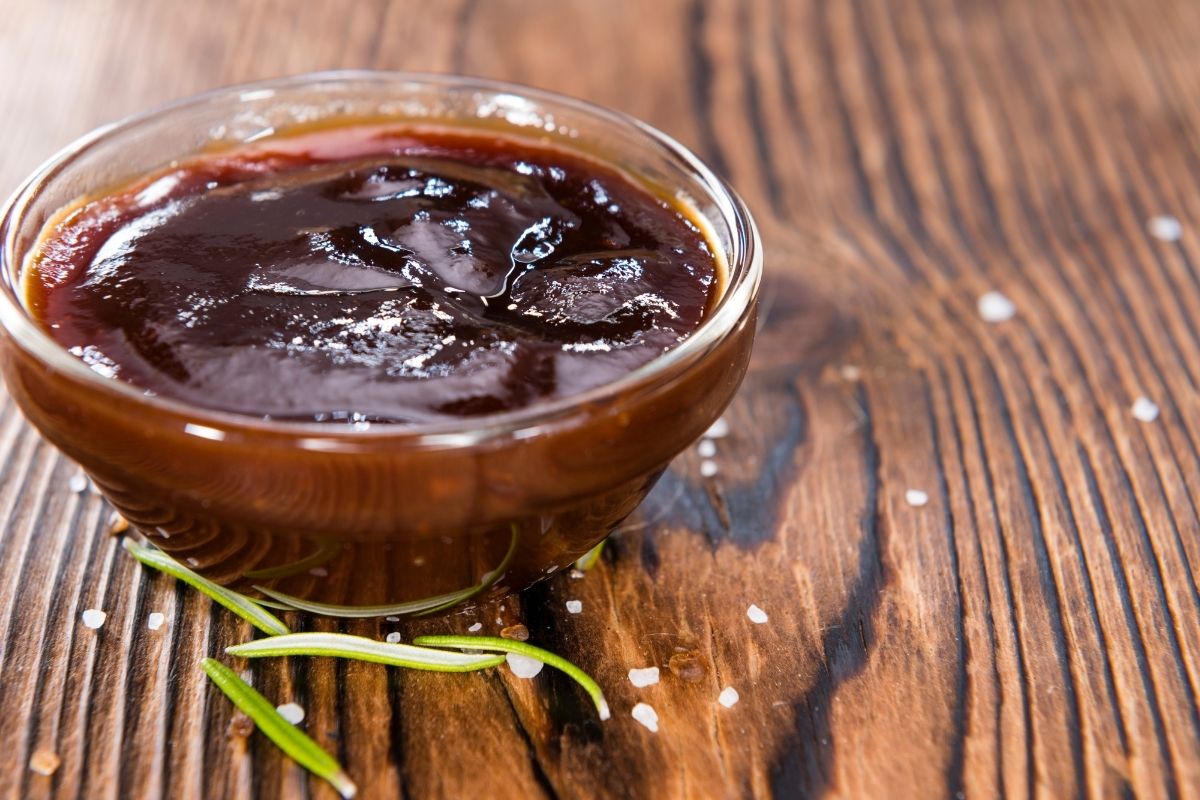
The most common binder for briskets is mustard, but you could also use barbecue sauce, olive oil, or honey.
You can either purchase a ready made dry rub for your brisket or you can make your own.
There are so many recipes out there that you can find online to make your dry rub, or you could completely make it up and create some magic!
Our favorite brisket rub is a barbecue flavored one – it tastes delicious and it doesn’t take very long to prepare at all. Simply throw all of the spices in a bowl, mix them together, and rub all over the meat.
The more rub you use, the more flavor will remain on your brisket. So, don’t skimp on the dry rub or binder. Use as much as you want, and really layer it on there!
Here is the recipe for our favorite recipe for a barbecue dry rub. Again, add all of these ingredients into a bowl and blend well before rubbing on the brisket.
Barbecue Dry Rub
– 3 tablespoons of chili powder
– 1 tablespoon salt
– 1 tablespoon black pepper
– 1 tablespoon brown sugar (this will melt into the meat much nicer than granulated sugar, which will leave your brisket with a gritty texture)
– 1 tablespoon oregano (dried or fresh – up to you!)
– 3 teaspoons crushed garlic
– 1 teaspoon cumin
– 1 teaspoon onion powder
– 1 teaspoon smoked paprika
– 1 teaspoon cayenne pepper
This rub is fairly hot with a strong garlic taste. If you’re not a fan of heat or garlic, feel free to reduce the amount of chili and cayenne pepper, and only add one or two teaspoons of garlic.
Substitute these missing ingredients with something else so that you still have enough to cover the entire brisket.
Make sure that you taste the dry rub before putting it all over your brisket. Otherwise you might be putting a rub on something that you don’t like, which will ruin all of your hard work getting to the final product.
Some people prefer to apply the rub to the brisket the night before cooking so that it can start to make its way into the meat before it’s cooked.
To do this, add the rub before tightly wrapping it in clear wrap and storing it in the fridge.
However, it’s worth noting that leaving the rub on overnight is going to have minimal effects on the brisket.
So, don’t feel as though you HAVE to add the rub the night before if you’d prefer to prepare the meat all in one go before cooking.
4. Preparing The Electric Smoker
Your meat is now fully prepared for cooking! Now all that is left to do is prepare your smoker before you can start cooking your brisket. The smoker needs to be completely preheated before adding your brisket into it.
Wait until your electric smoker has reached, and stabilized, at a temperature of 225 degrees Fahrenheit.
Keeping this as a stable temperature while cooking your brisket will ensure that the smoker is continuously hot enough to break down the connective tissues.
Allowing the connective tissues to break down properly ensures that your brisket will be tender and melt as soon as it enters your mouth.
Now add your wood chips. You’ll want to add about 2 cups of wood chips per pound of meat. This will help create smoke flavor when the meat cooks.
You’ll also want to make sure that your chips are dry to ensure that they smoke correctly.
Wait until the smoke is clear before adding your meat in, just like any other time you would use your smoker.
This means that you allow the fire to subside enough to stop it creating black smoke, as this will leave your brisket with a bitter taste.
Instead, you want thin blue smoke. This will give you a nicer taste as it will allow the wood flavor to come through.
Our favorite wood chips to use for brisket are cherry wood chips, although oak and hickory are also very good contenders.
5. Starting The Cooking Process
Now it’s time to add your brisket into the smoker. However, before you do this, make sure that you bring your brisket to room temperature.
This simply means taking it out of the refrigerator a few hours before cooking. This shouldn’t take too long, but bear in mind that the larger the brisket, the longer this process will take.
The time has finally come – put that brisket in your electric smoker! The fat cap should be on the top of your brisket to prevent the meat from drying out.
However, your smoker might require a different position of your brisket. Always have the fat cap where the heat source is coming from.
So, if the heat source is at the bottom of the smoker, have the fat cap at the bottom of the brisket.
If the heat source is on the side of the smoker, make sure that the point is closest to it. This will prevent the meat from drying out as much as possible.
Remember that the point is fattier meat, meaning it won’t dry out as quickly as the flat.
Put a drip pan beneath the brisket so that you can avoid flare ups as much as possible. Here you’ll be able to catch all of the juices from the meat as it cooks, which you can reuse for gravy or other sauces later.
Now it’s time to set your water pan up. Place a pan filled with liquid – it could be water, cider, juice, or beer – inside of the smoker.
As the fire removes moisture away from the meat, the steam from this liquid will put it back into the meat and prevent it from drying out.
A water pan also allows the smoke to penetrate the meat further.
Once you have added all of these components, it’s time to close the smoker’s door and let the smoke cook your perfect brisket. Relax and dream of your next delicious meal.
Some things to bear in mind while waiting for your brisket to cook in your electric smoker:
– Don’t open the lid or door! We know how tempting it is to sneak a peek at your cooking brisket, but this will allow all of the smoke to escape out of the chamber.
This means that the smoke will be getting out of the smoker rather than getting into your meat.
– Keep an eye on the temperature gauge. If it starts to drop, don’t panic – just keep checking it every 30 minutes or so. If the temperature starts to dip or rise, check the wood chips to see anything needs changing.
After the first two hours, your meat will have finished taking the majority of the flavor that it is going to.
The cooking time after this will not affect the flavor as much, so you might want to help it by using a spray bottle to spray water, stock, juice, or vinegar onto the meat.
Spray your meat every 30 minutes to an hour. This ensures that your meat stays moist and succulent, and it will also help to create the dark bark on the exterior of the meat.
6. Determining Cooking Time
Once the meat is in the electric smoker, you have to work out how long you should leave your brisket in the smoker for. This will help you to give an estimate of when your meat should be ready to serve.
There’s not much worse than keeping everyone waiting for food because you got the cooking times wrong.
The general consensus is that it takes around 1 hour and 15 minutes for every pound of brisket. But, take this as a general rule though as there can be a lot of other factors to vary this cooking time.
These might include the size of the brisket, the type of smoker you’re using, your fuel and wood chips, what the weather is like, and much more.
Having said that, here is an example of how to work out your brisket cooking time.
At 225 degrees Fahrenheit, cooking a brisket will take around 1.5 hours per pound. So, a 10 pound brisket will take (10 x 1.5 = 15) 15 hours of cooking time.
Remember that this is only a rough guide, so make sure that you are using a temperature thermometer to test when your brisket is cooked fully.
7. Reaching The Optimal Temperature
So, you know how long it’s roughly going to take to finish cooking your brisket. But how do you ensure that you’re not overcooking it in the smoker?
How would you know if all the meat was drying up right now while you watch it from the outside?
Here is where your internal thermometer comes in. A good one will tell you whether the temperature of your meat is too high or low.
You’ll need to set your thermostat to the correct level before putting your meat in the smoker.
You could use a manual thermometer to measure the temperature inside the meat, but these aren’t very accurate.
They tend to read higher temperatures than they actually are. It’s better to rely on a digital thermometer instead for more accuracy.
Smoking meat at low temperatures can take hours to increase internal temperatures.
If you find the temperature hitting 145 degrees Fahrenheit before remaining level for the next couple checks, then you might be starting to experience the ‘stall’.
This is a commonly known term among smoked meat lovers, and it’s not a welcome one.
A stall in smoker’s terms is when the process of smoking meat at low temperatures stops increasing and remains the same for hours. The stall will be occurring while the meat is at between 145 and 165 degrees Fahrenheit.
This is when your brisket will be sweating the most. The moisture will be being pushed out of the muscles towards the surface. Here, said moisture evaporates into the smoker and cools the exterior of the meat down further.
It will also reduce the temperature of the smoker, further prolonging the stall.
How To Stop The Stall
There are a number of things that you could do to prevent the stall from lasting too long.
– Wrapping your meat: Moisture sweating from the meat and cooling the internal temperature of your smoker is what is causing the stall to occur, so you might choose to wrap your meat rather than leave it bare.
You might have heard of the Texas Crutch, which is the process of wrapping meat before smoking it. While this might not be common practice in other parts of the USA, it is very commonly seen through Texas.
You can choose to wrap your meat in foil or butcher paper. Make sure that the latter is unwaxed to avoid the wax melting and sticking to your brisket.
Wrap the meat completely in whichever material you have chosen to use, making sure that there are no holes where moisture can escape from.
Baste your meat with your chosen liquid, such as beer or juice, before closing the wrap. This will help to prevent the meat from drying out.
– Increase the temperature inside of your smoker: Another option to prevent the stall from sticking around too long is to increase the temperature inside of your smoker.
Turn it up to 300 degrees until the internal temperature of the brisket reaches 165. Once you’re out of the stall, turn the temperature back down and continue cooking.
Knowing When Your Brisket Is Done
Your brisket should be done once the internal temperature reaches 190 degrees Fahrenheit.
Once you find this temperature within the meat, continue poking it with your thermometer to make sure that it is 190 across the board.
Pay attention to how the thermometer enters the brisket. If the meat is fully cooked, it should glide in and out of the brisket with not much trouble at all.
A brisket should move like jelly, so pick it up and give it a wiggle. If it looks like jelly, then it’s most likely finished cooking.
If you’re still unsure and want to err on the side of caution, you can leave it in the smoker until the internal temperature reaches between 195 and 205.
8. Resting The Meat
Now that you are happy with the fact that your brisket is cooked, remove it from the smoker and marvel at your work.
We know that it is tempting to try a piece of that delectable meat right now, but it is imperative that you let the meat rest before slicing it.
Resting the meat will allow the juices to disperse throughout the brisket to make it even more delicious when you do get to serve it.
Slicing too prematurely will leave you with a plate full of juices that should still be integrated within the meat.
For the best results, leave your brisket to rest until it reaches an internal temperature of around 170 degrees. This will only usually take an hour, so get excited!
(Don’t put the brisket in the freezer to try and get to this temperature quicker!)
Trust the process and give the brisket time to perfect itself. Trust us, you won’t regret this final hour!
9. Slicing And Serving
Finally – the time has come to try your brisket for yourself. Put your brisket on a cutting board and get your best serrated knife out.
Make sure that the knife is longer than the brisket so that you can cut a slice with just one slicing motion. Otherwise you will shred the meat.
Unfortunately, slicing your brisket is not as simple as you might have been hoping for. We know you just want to eat your brisket – not too long now!
But first we must teach you about the differences between the point and the flat.
Remember that the flat is the leaner side of the brisket while the point is the fatter, juicier side? Well, that’s not where the differences end.
These two parts of the brisket also have different grains, so you’re going to have to cut them in different ways.
Start by slicing the flat, and go against the grain to get smooth slices. Once you get to the point, though, turn the brisket around and cut against the grain of the point.
Make sure that you’re not scraping the bark off of the outside of your brisket.
Cut your slices to be around a quarter inch thick. You can make your slices a little thicker if you’d prefer, but don’t go over half an inch.
This thickness ensures that the brisket isn’t too tough or chewy to take away from your enjoyment.
Only cut enough from your brisket that you’re serving now. If you’re leaving any leftovers, leave that portion unsliced to prevent it from drying out.
Wrap the leftovers tightly to prevent any moisture from being removed before you serve it again.
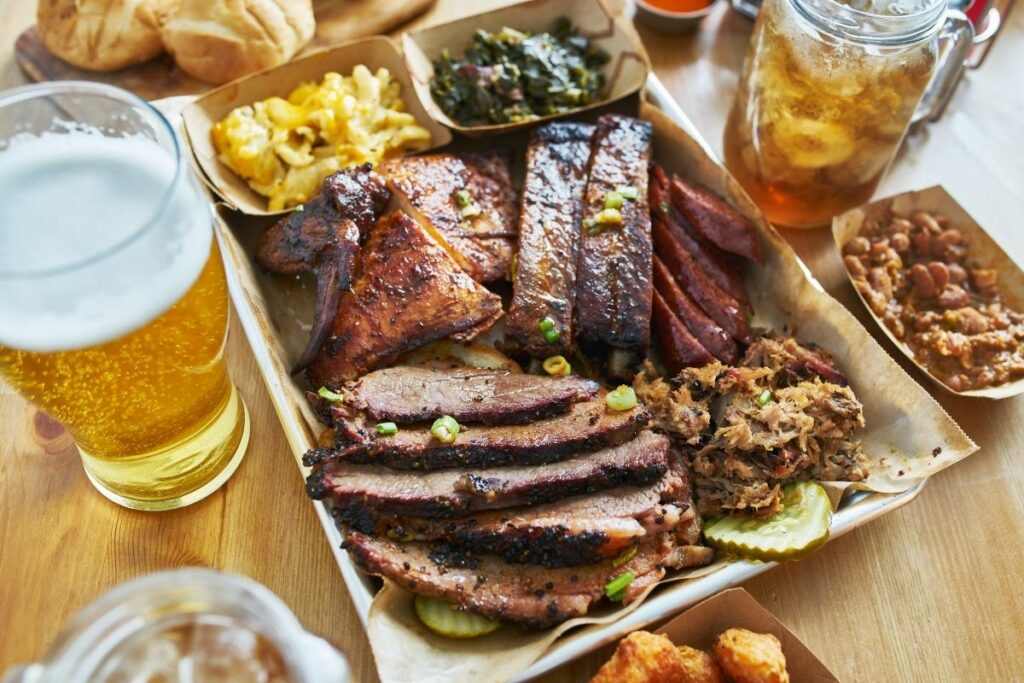
Serve the brisket that you have sliced for now with your favorite side dishes, such as mash potato and gravy. And enjoy it! You’ve put in all of that work and now you get to reap the rewards. We’re definitely not jealous, at all.
10. Using Your Leftover Brisket
Briskets tend to be quite large, so unless you’re feeding a party with your brisket, you’ll probably have some leftovers.
The good news is that you can do whatever you want with your brisket – make tacos, nachos, pot pie… the list goes on!
One important thing to note, however, is that you have to know how to reheat the brisket properly so that it doesn’t dry out and that it is safe to eat.
A brisket in the refrigerator can last approximately four days, as long as it is wrapped and kept in the right conditions.
When you’re ready to use some of your leftover brisket, take it out of the fridge and slice how much you want to use.
There are now a few ways of reheating that you can choose from, which we have listed here:
– In the smoker: using the smoker again to reheat your meat is a good excuse to get the smoker back out and use it some more. Heat your smoker to 225 degrees and wrap your brisket in foil to prevent it drying out.
Place the meat in the smoker and use your meat thermometer to let you know when it’s ready.
Once the brisket reaches 155 degrees, take it out of the foil and put the meat back into the smoker bare. Wait until the temperature reaches 160 and enjoy!
– Using the oven: Preheat the oven to 325 degrees and place your brisket on an oven tray. Pour any juices over the meat to help keep it moist. You can also use barbecue sauce.
Cover the tray with foil, ensuring no holes for the moisture to escape from.
Once the meat reaches an internal temperature of 160 degrees, take it out of the oven and enjoy!
– Stove top: Fill a pot with apple juice and begin heating on the stove top. Cut your brisket and place it on a dish that fits within your steam basket.
If you don’t have a suitable sized dish, line your steam basket with greaseproof paper so that the brisket can’t fall through the basket.
Once the juice starts producing steam, place the steam basket over the top of the pot and leave until the internal temperature reaches 165 degrees.
You can always use water instead of apple juice if you don’t have the latter, although it won’t add to the taste of the brisket.
– Blasting in the microwave: You can reheat your brisket in the microwave, although this is not how most would do it, and some meat lovers might wince at the thought.
If you’re in a tight spot, however, microwaving your brisket can be a very quick way of reheating it.
Cook your brisket in the microwave at one minute intervals while checking the temperature between each one. Cooking slowly like this can prevent the meat from drying out and stop you from overcooking it.
Wait for an internal temperature of 165 before eating.
Smoked Brisket Recipe

Now we have a recipe for you to try when first starting out smoking briskets. It is an easy recipe, so don’t worry about it being too difficult for your first try.
Remember that you can alter the spice rub ingredients if you don’t like it too spicy.
Ingredients
For the brisket:
– 1 8-pound brisket
– Liquid for basting (apple juice, cider, beer, stock, water)
– Binder (mustard, olive oil, honey, etc.)
For the spice rub:
– 3 tablespoons of chili powder
– 1 tablespoon salt
– 1 tablespoon black pepper
– 1 tablespoon brown sugar
– 1 tablespoon oregano (dried or fresh)
– 3 teaspoons crushed garlic
– 1 teaspoon cumin
– 1 teaspoon onion powder
– 1 teaspoon smoked paprika
– 1 teaspoon cayenne pepper
Equipment
– Smoker
– Wood chips of your choice
– Spray bottle
– Unwaxed butcher paper or aluminum foil
– Gloves
– Narrow curved boning knife (for trimming the fat)
– Meat thermometer
Method
1. Start with your brisket at room temperature, so if it has been in the refrigerator until this point, take it out and wait between 30 and 60 minutes for it to reach the ideal temperature.
2. Trim the excess fat off of your brisket using your boning knife. Also trim the deckle and silver skin. Make sure that the fat cap is even so that your brisket cooks evenly.
3. Put all of the ingredients for the spice rub (chili powder, salt, black pepper, brown sugar, oregano, crushed garlic, cumin, onion powder, smoked paprika, cayenne pepper) into a bowl and mix them all together.
Make sure that you try the spice rub before putting it all over your brisket so that you know you’re going to like it!
4. Put your gloves on and coat the brisket with your chosen binder. We love using mustard, but you can use whatever you think is going to enhance the flavor of your brisket the best.
Now press your spice rub into your binder so that the meat is completely covered.
Remember, more is more in this case! Keep adding until all of the meat is completely covered in spice. Make more of the spice rub if you need to, you won’t regret it.
5. Preheat the smoker to 225 degrees. Add the wood chips of your choice (we like cherry) and wait for the inside of the smoker to come to temperature.
Make sure that you are only putting your brisket into the smoker when there is thin blue smoke coming from it rather than thick black smoke.
6. Add your brisket into the smoker with the fat cap in between the meat and wherever the heat source is. For example, if the heat source is at the bottom of the smoker, put the brisket fat cap side down.
Set up your thermometer and add the water pan before closing the door of the smoker.
7. Wait for three hours before opening the smoker back up. Add your chosen liquid for basting into the spray bottle.
After three hours, open the smoker backup and spray your meat with your chosen liquid. Now do this for every 30 minutes.
8. This step is only for if you experience a stall in your smoking process. If the temperature hits 145 degrees then slows down, choose a method to prevent the stall from lasting too long.
You can either turn the temperature up to 300 degrees until the meat gets to 165, then turn it back down, or you can wrap your meat.
Take your chosen wrapping material and wrap the meat so that there are no open spots where moisture can get out from. Baste the meat before sealing the wrap and put it back into the smoker.
9. Continue smoking for another 4 hours or until you reach an internal temperature of between 195 and 205 degrees.
Check the temperature over different areas of the brisket to ensure that it has cooked evenly. Give it a jiggle – if it looks like jelly, then it should be done. Take it out of the smoker.
10. Allow your brisket to rest for an hour or until it reaches an internal temperature of 170 degrees. This will allow the juices to disperse through the meat and keep it moist.
11. Slice your brisket and serve with your favorite side dishes! Enjoy and be proud of your amazing smoked brisket sitting in front of you.
Notes
This brisket recipe is for an 8-pound brisket, and butcher paper was used to wrap it. Using the brisket cooking times listed above, we can determine that the cooking time is going to be 12.5 hours.
With it taking 1.5 hours of cooking time per pound of brisket at 225 degrees, the math is as follows:
8 x 1.5 = 12.5 hours cooking time.
The preparation time for this recipe is 10 minutes, and the rest time will be around an hour. So, the total time that this recipe will take is around 13.75 hours.
This 8-pound brisket will serve eight people and each serving contains 155 calories.
Frequently Asked Questions
Smoking a brisket is a big feat, and you don’t want to waste the money or time it’s taken to finish your brisket if it doesn’t turn out good.
So, here are some frequently asked questions and answers to ensure that you go into smoking your brisket as confident as possible.
How Long Does It Take To Smoke A Brisket In An Electric Smoker?
It’s difficult to give an accurate answer here as every smoker is different when it comes to cooking times. However, the general rule is that it will take approximately 45 to 60 minutes per pound of meat in a 225-degree smoker.
Bear in mind that this time will differ depending on the size and shape of your brisket, so keep your meat thermometer handy.
How Long Will It Take To Cook A 3.5 Pound Brisket In An Electric Smoker?
A 3.5-pound brisket will take about 6 hours to cook in a 225 degree smoker. This has been determined by using the math from the FAQ above.
However, we must reiterate that it might take a shorter or longer amount of time to cook this brisket, depending on a number of factors.
Should You Wrap A Brisket In An Electric Smoker?
Whether or not you wrap your brisket is up to you. We recommend doing so because it helps retain heat inside the smoker and prevents any moisture from escaping.
If you do decide to use butcher paper, make sure that you cover all the edges of the brisket so that there are no open spots.
You can either wrap your meat in foil or butcher paper. Foil is the most popular method as it creates a mini oven over your meat to keep the heat in.
It will also help to keep the moisture surrounding the brisket to stop it drying out.
Some people don’t like wrapping their brisket with foil, however, as it can leave you with a thick bark on the meat.
Alternatively, you can use butcher paper as long as it is unwaxed. Butcher paper is thinner than foil so allows the meat to breathe, just not as much as without it.
Butcher paper also allows the meat to be penetrated by the smoke, which foil doesn’t do.
If you don’t want to use a wrapping technique, then you don’t have to. This will leave you with a much more concentrated smoky flavor but a thinner bark.
Bear in mind that smoking without wrapping will dry the meat out quickly and potentially prolong the stall if you experience it.
The happy medium, in our opinion, is using butcher paper. You get a decent smoky flavor with a good thickness of the bark, and it won’t dry out in the cooking process.
Why Does Brisket Stick To Aluminum Foil While Smoking?
Briskets tend to stick to aluminum foil while smoking due to the high fat content. The fat is what causes the meat to stick to the foil. Therefore, you need to remove the excess fat before placing the brisket in the smoker.
Another reason why your brisket might be sticking to the foil is due to there not being enough liquid underneath it. Try basting it more to ensure that the meat retains more juices to prevent it from becoming too dry.
How Long Will It Take To Smoke A Brisket At 225?
We mentioned earlier that a 3.5-pound beef brisket should take around 6 hours to cook at 225 degrees Fahrenheit.
Bear in mind that this time could vary slightly depending on how big your brisket is. For example, a smaller brisket may only take 5 hours to cook. Or, a larger one may take 7 hours.
However, we would still recommend 6 hours for a 3.5 pound brisket.
We would recommend using our brisket cooking times mentioned earlier in the article to ensure that you are using the right amount of time to plan your meal.
What Temperature Should I Use To Smoke My Brisket?
When smoking a brisket, you need to start off low and increase the temperature slowly. This is to avoid burning the outside of the meat.
Also, you want to avoid having the temperature go above 250 degrees Fahrenheit as it will cause the meat to dry out.
In order to achieve this, you can place your brisket in the smoker at 200 degrees Fahrenheit and gradually raise the temperature until it reaches 225 degrees Fahrenheit.
We wouldn’t go much higher than 250 degrees as it will cause the brisket to cook too quickly and dry out.
Summary
So, there you have it! That’s all there is to smoking a brisket. Hopefully, you now know everything you need to know about smoking a brisket. It can be a long process, but it is so worth it when you do it correctly.
The best advice we can give you is to go low and slow when cooking, and to not cut corners.
We know that you might not want to wait for the meat to come to room temperature before cooking, or allow it to rest after it’s come out of the smoker, but these are very important steps that will affect the end result if used.
What are you waiting for? Get out there and enjoy your smoked brisket (in 12 hours)!

In fact, my grilling experience stems from even before that, when I used to watch my father grill outdoors. Some of my favorite memories growing up were surrounding the grill in the backyard, or a portable grill on the beach or in the park.
- The 9 Best BBQ Grills for Smoking Brisket - December 29, 2022
- 6 Mouth Watering Grilled Shrimp Recipes - September 16, 2022
- 6 Delicious Grilled Desserts - September 16, 2022
